
このチュートリアルは武蔵野美術大学通信教育課程授業用に作成したものです。
今回はシャープ製距離センサーを使って手を触れずに距離を測るサンプルを確認してゆきます。
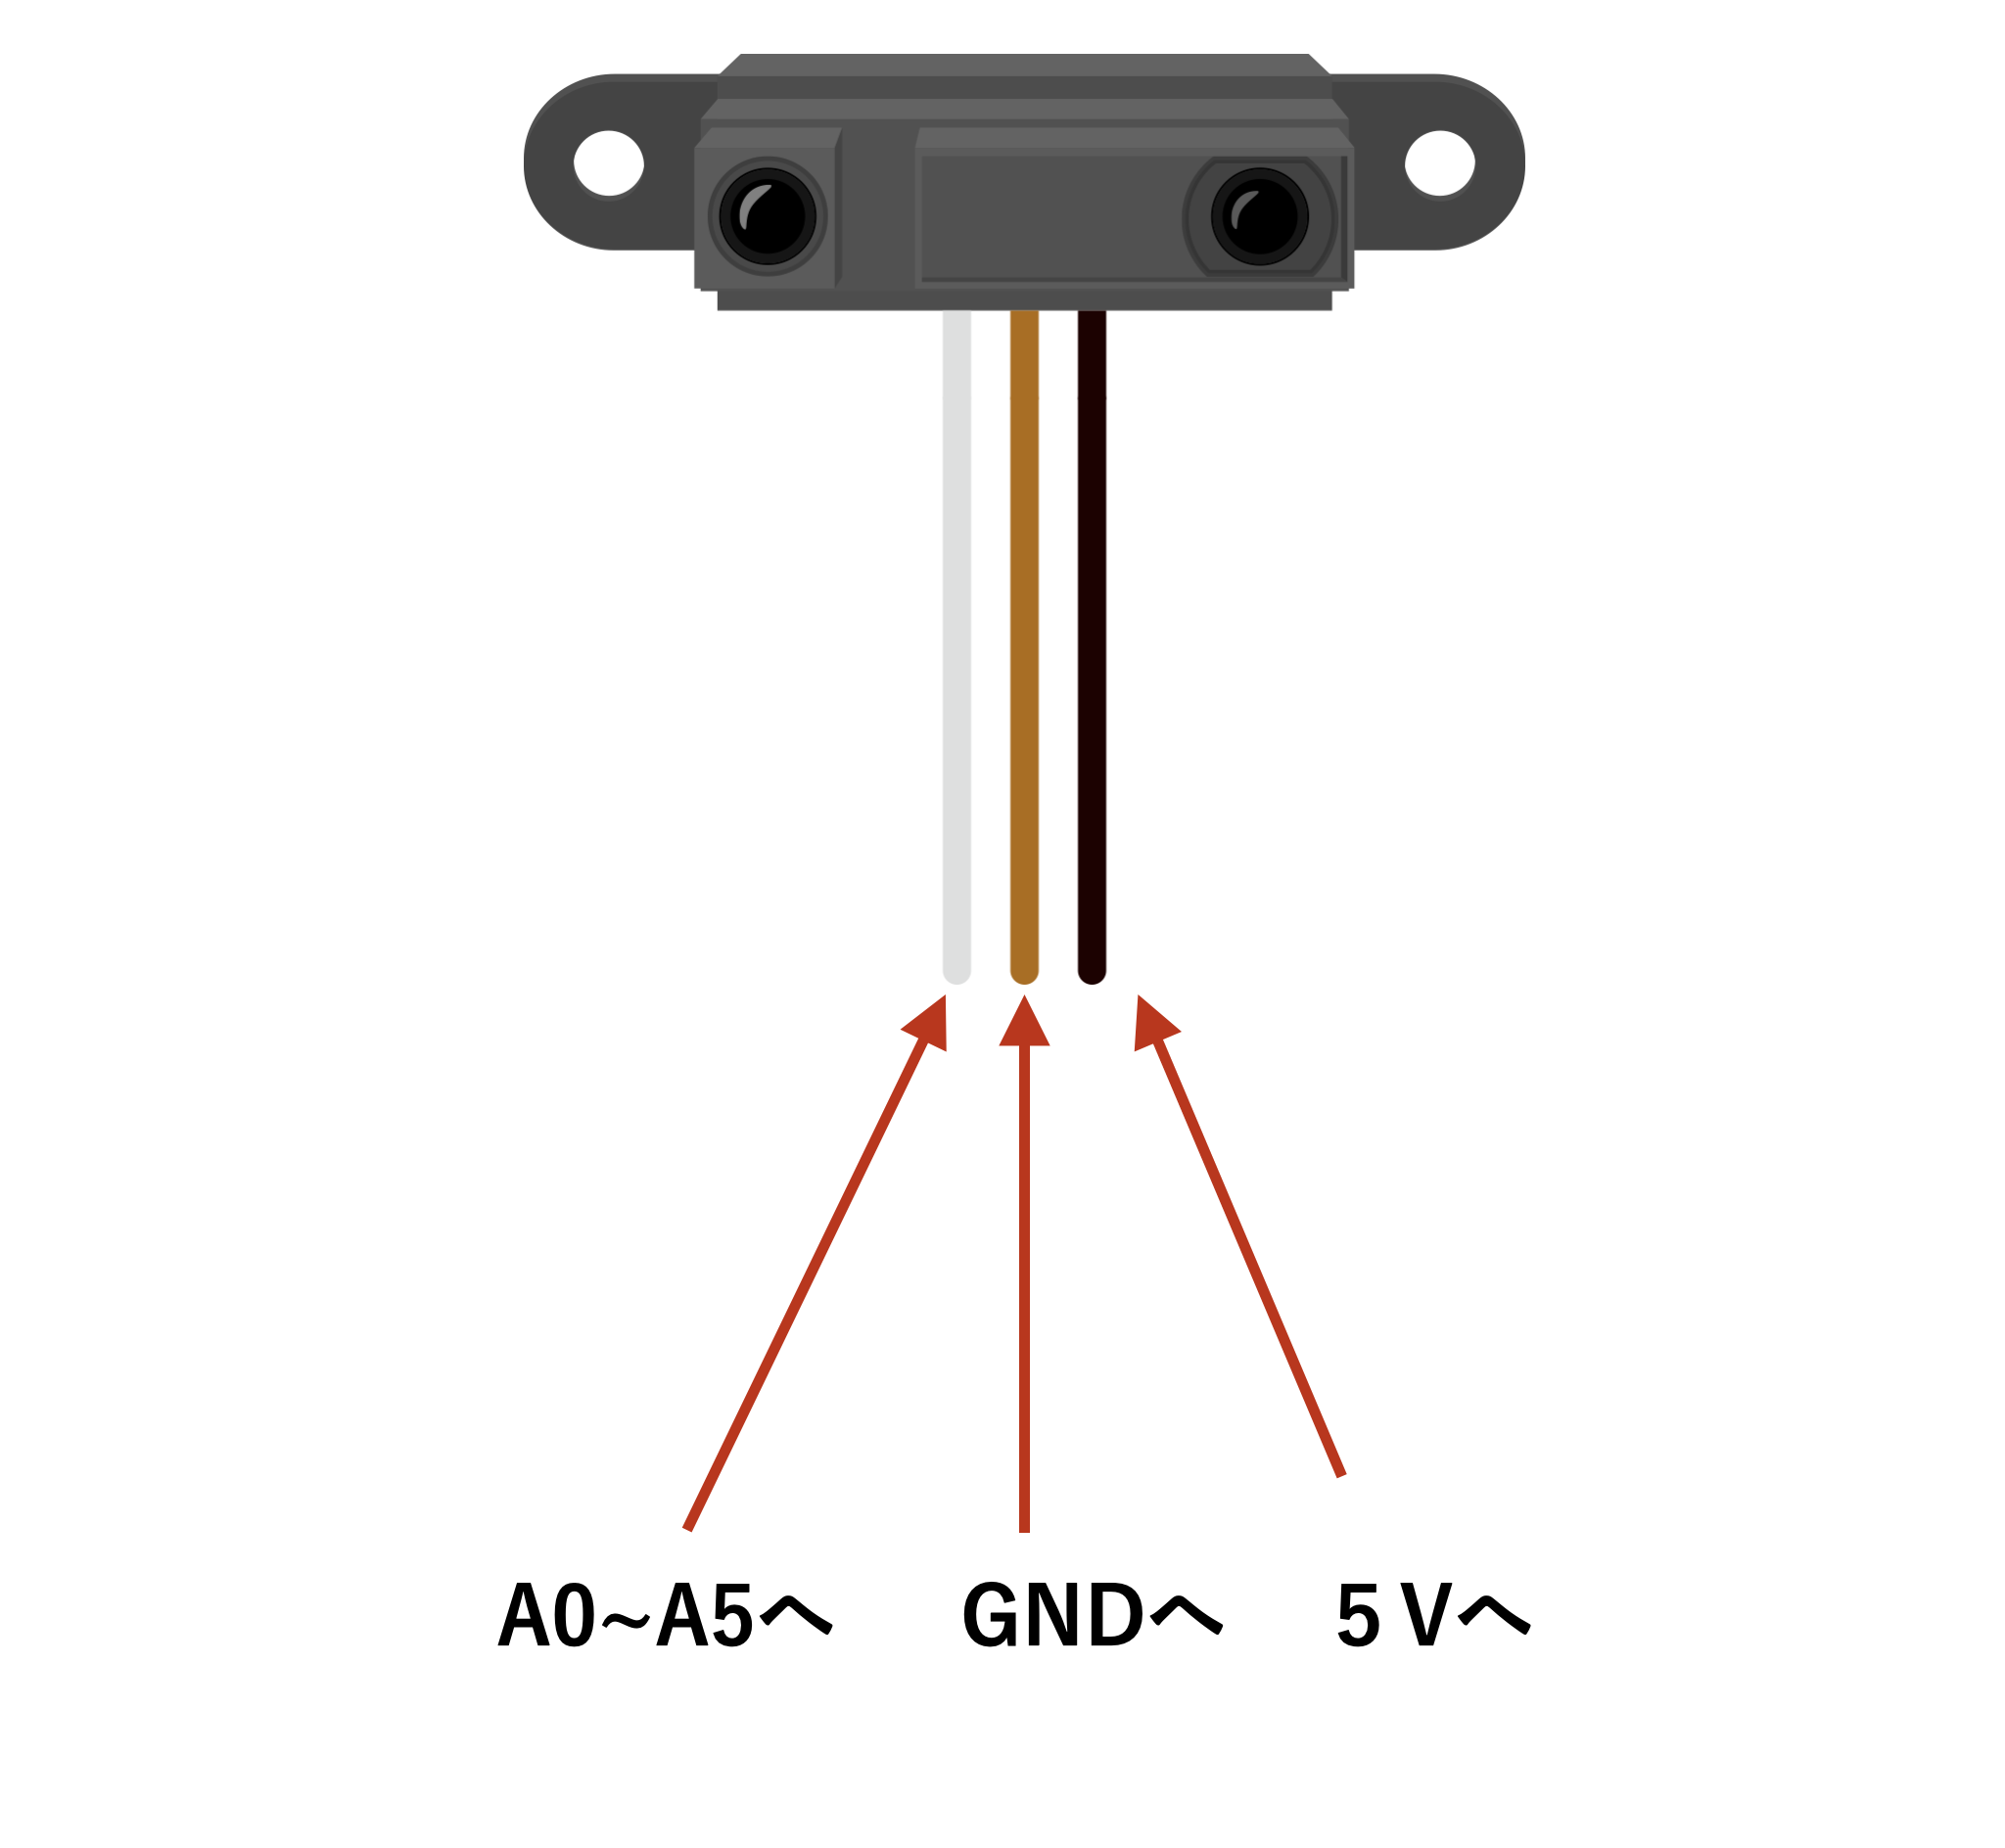
授業貸与機材の距離センサーはケーブルの色が固定されてますので位置もしくはケーブルの色でどのピンに挿す必要があるか判断できます。こちらのセンサーはとても繊細なので、間違って挿したりしないようによく注意してください

プログラム
今回はexampleの「AnalogReadSerial」を試してみます。
/*
  AnalogReadSerial

  Reads an analog input on pin 0, prints the result to the Serial Monitor.
  Graphical representation is available using Serial Plotter (Tools > Serial Plotter menu).
  Attach the center pin of a potentiometer to pin A0, and the outside pins to +5V and ground.

  This example code is in the public domain.

  https://www.arduino.cc/en/Tutorial/BuiltInExamples/AnalogReadSerial
*/

// the setup routine runs once when you press reset:
void setup() {
  // initialize serial communication at 9600 bits per second:
  Serial.begin(9600);
}

// the loop routine runs over and over again forever:
void loop() {
  // read the input on analog pin 0:
  int sensorValue = analogRead(A0);
  // print out the value you read:
  Serial.println(sensorValue);
  delay(1);        // delay in between reads for stability
}
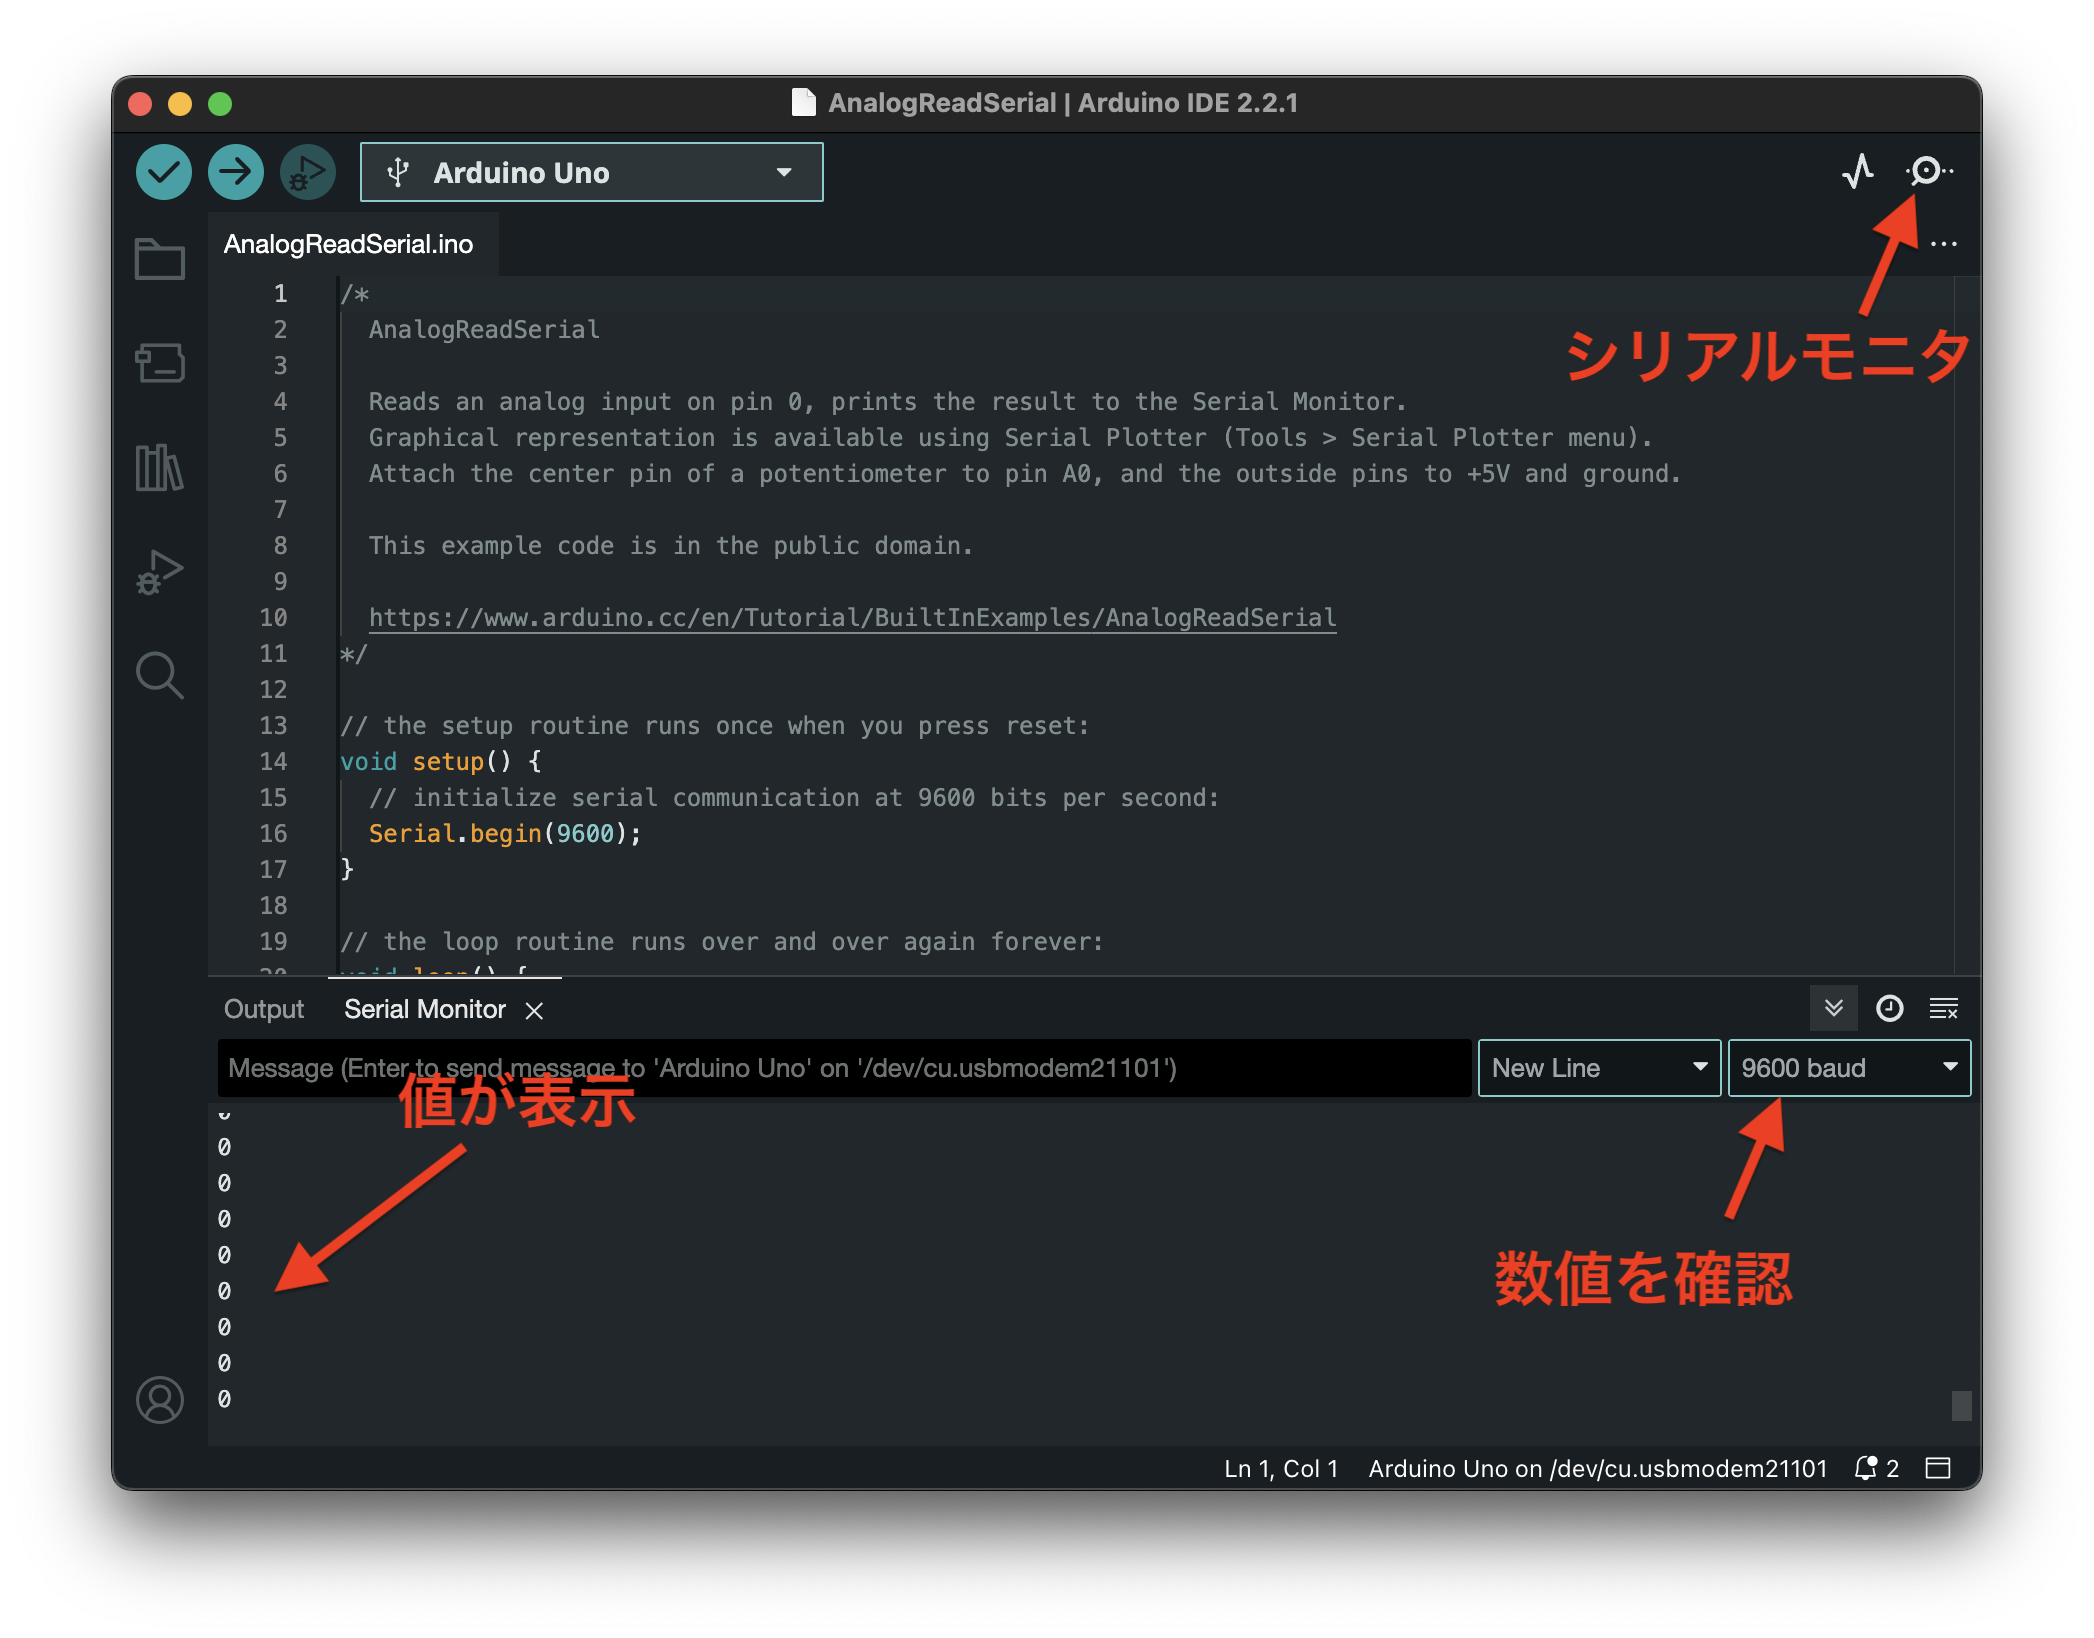
距離センサに手をかざすとその距離に合わせて値が変化します。簡単ですね!